How to Create Customized Complex Linetypes with Embedded Shapes
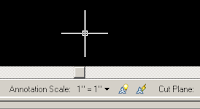
Step 1 - Open a new DWG and set the drawing / annotation scale to 1 = 1
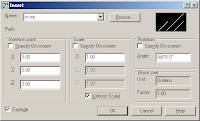
Step 2 - Insert the block you wish to add to the linetype at 0,0,0 with a uniform scale and explode it
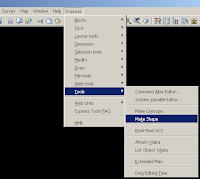
Step 3 - From the Express menu, select Tools and then Make Shape
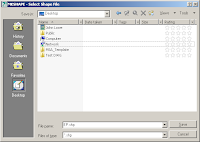
Step 4 - From the MKSHAPE dialog box, browse to a location where you can save the new Shape file, enter a descriptive name for it select Save
Step 5 - Look to the command line to set several options for your Autocad Shape file. Set the resolution to 200 and select all of the exploded objects that you want in your shape file and press Enter. Civil 3D will show you that the shape was created successfully.
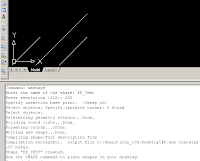
Step 6 - Now, we want to insert the new shape file into the drawing. To insert the shape, type SHAPE at the command line and enter the name of your shape file. You will then be prompted to place it and scale it - we want to put it right on top of the exploded block so we can use the O-snaps.
Step 7 - Next you will want to draw three .25-inch lines to create what will become the dashed line of your linetype. Start at the left-most point on your shape and work your way over. The total length of the line left-to-right should be about 1 inch.

Step 8 - Now, from the Express menu, choose Tools and Make Linetype. The MKLTYPE dialog box will open and prompt you for a name and location for your linetype. If you have an existing linetype file created, you can select it to add this linetype definition to the existing file.

Step 9 - After you choose your lintype file name and location. You will be prompted to Name the linetype within the linetype file and give a description and select the object you want to use to create the linetype. The description can be anything from a verbal description to a simple graphical representation of the linetype itself. When you are prompted to specify the start and end points of the line definition, choose the start and end points of your line or dashed line. When you are prompted to choose the objects, choose your shape and your line or dashed line(s).

Step 10 - Once you hit enter, Autocad will tell you that your linetype is created and loaded. A quick check at your Linetype toobar / drop-down menu will confirm this.

Step 11 - Test your new linetype. Start a new drawing and type Linetype at the command window to load your new linetype. Browse the the saved location of your linetype file to load it.


No comments:
Post a Comment